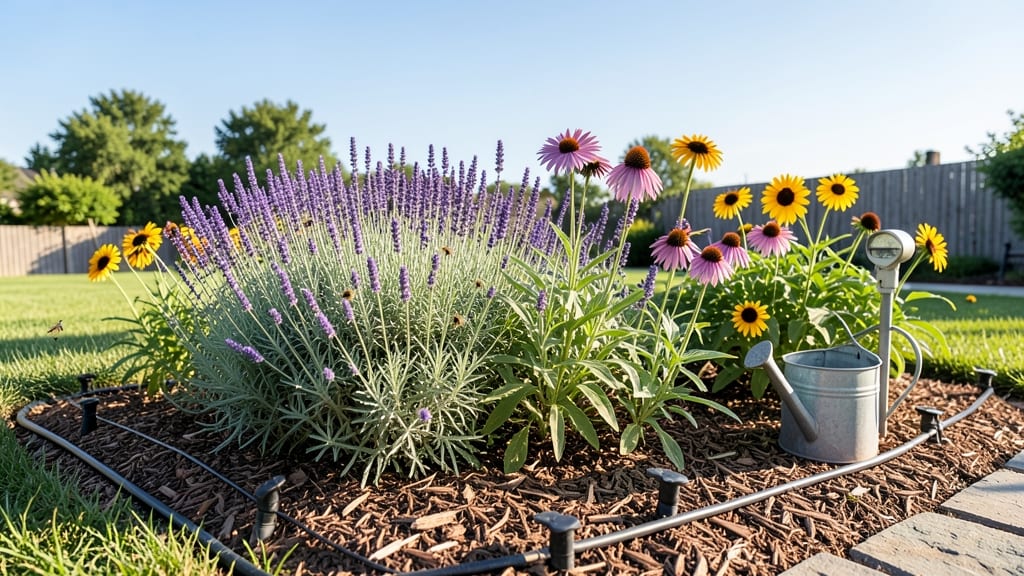
Buying guide: how to choose the right flower bed watering system
1. System Size and Coverage Area 💡
First, measure your flower bed’s dimensions and calculate the total square footage you need to cover.
A common rule of thumb is to allow 1–2 gallons per hour (GPH) per plant for most flowers, but drought-tolerant varieties like lavender may need less. Mid-range systems with 50–100 feet of tubing are ideal for medium-sized beds (up to 200 sq. ft.), while budget-friendly options with 25 feet work well for small gardens or container setups.
Counter-intuitively, larger tubing (like 1/2-inch) isn’t always better—it can waste water if your bed is small. Instead, opt for flexible tubing that adapts to your layout without excess. For hilly gardens, prioritize pressure-compensating emitters to ensure even watering across elevation changes.
2. Emitter Type and Flow Rate Customization ⚡
The right emitter type makes all the difference in plant health. Adjustable emitters (0.5–8 GPH) let you fine-tune water delivery for each plant—critical for mixing moisture-loving roses with drought-resistant succulents. Pressure-compensating emitters are a game-changer for uneven terrain, maintaining consistent flow regardless of hose pressure or elevation.
For budget-friendly systems, fixed emitters (like 1.6 GPH) work well for uniform beds, but they lack flexibility. Pro tip: Micro-sprayers (0.5–1 GPH) are perfect for seedlings or delicate flowers, while stream emitters (2–4 GPH) suit heartier perennials.
Always match your emitter flow to your soil’s drainage—sandy soil needs frequent, light watering, while clay soil benefits from deeper, less frequent cycles.
3. Compatibility with Water Sources and Power ✅
Not all systems play nice with every water source. Manual systems (like hose-end timers) are the simplest but require direct hose connections, limiting mobility.
For automated setups, check if the system works with your existing irrigation controller or needs a separate timer. Solar-powered controllers are a premium choice for off-grid gardens, eliminating power cords while adding weather-based scheduling.
If you’re using a well or rainwater barrel, ensure the system can handle lower pressure—some emitters clog or underperform below 20 PSI. I recommend adding a pressure regulator (often sold separately) to protect delicate emitters, especially in high-rise setups.
For smart systems, verify Wi-Fi compatibility and app functionality before buying—some require subscriptions or have limited local control.
4. Ease of Installation and Maintenance Requirements 🔍
Skip the frustration of fiddly connectors! Push-fit or barbed connectors are far easier to assemble than threaded PVC, and they reduce leaks. Mid-range systems often include everything you need (tubing, emitters, filters, and timers), while budget-friendly kits may require add-ons like a separate timer or hose adapter.
Maintenance is where many systems fail—clogged emitters are the #1 issue, often caused by unfiltered water or debris. Always install a 180-micron filter at the water source to extend your system’s lifespan. For DIY-friendly setups, look for systems with color-coded tubing or labeled connectors.
If you’re not comfortable with tools, pre-assembled kits (like the classic essential pick) save time and hassle. And remember: Winterize your system by draining tubing and storing emitters indoors to prevent freezing damage.
Frequently asked questions
Q: What’s the best type of flower bed watering system for beginners?
For beginners, I recommend starting with a budget-friendly drip irrigation kit featuring pre-assembled tubing and adjustable emitters. These systems are designed for easy setup—just connect to your hose, lay the tubing along your flower bed, and adjust the emitters to match your plants’ water needs. Look for kits with push-fit connectors to avoid fiddly tools, and prioritize pressure-compensating emitters if your garden has uneven terrain. These features ensure consistent watering with minimal effort, making them perfect for first-time users.
Q: Can I use a flower bed watering system with a well or rainwater barrel?
Yes, but you’ll need to check the pressure requirements of your system. Most drip irrigation kits work with standard hose pressure (30–60 PSI), but wells or rainwater barrels often deliver lower pressure (10–20 PSI). If your system includes pressure-compensating emitters, it should handle lower pressure without issues. For non-compensating systems, add a pressure regulator (typically $10–$20) to protect emitters from clogs or uneven flow. Always install a 180-micron filter to prevent debris from damaging the tubing or emitters.
Q: Why aren’t my emitters delivering water evenly?
Uneven watering is usually caused by clogged emitters or air pockets in the tubing. Start by flushing the system with a garden hose to clear debris. If clogs persist, disconnect emitters and soak them in vinegar or a commercial descaler for 30 minutes. Check for air gaps by submerging the end of the tubing in water—if bubbles rise, you’ve found the issue. For hilly gardens, use pressure-compensating emitters to maintain consistent flow. If the problem continues, verify your water pressure and adjust emitters to match your soil’s drainage needs (e.g., 1–2 GPH for sandy soil, 0.5–1 GPH for clay).
Q: What’s the difference between a mid-range and a premium flower bed watering system?
A mid-range system offers versatility and ease of use with features like adjustable emitters (0.5–8 GPH), flexible tubing, and easy-connect fittings, making it ideal for most flower beds. These systems often include basic timers and are perfect for gardeners who want customization without complexity. In contrast, a premium system adds smart technology, such as Wi-Fi app control, weather-based scheduling, and solar panel compatibility, along with advanced pressure compensation and multi-zone programming. Premium systems are an investment piece for large gardens or those seeking automation, while mid-range kits provide reliable performance at a lower cost.
Q: How long will a flower bed watering system last?
With proper maintenance, a high-quality drip irrigation system can last 5–10 years or longer. Budget-friendly kits may degrade faster (3–5 years) due to thinner tubing or cheaper materials, while premium systems with durable PVC tubing or brass connectors often outlast them. To extend lifespan, flush the system annually, winterize by draining tubing, and replace emitters every 2–3 years if clogs become frequent. Investing in a mid-range or premium system upfront saves money long-term by reducing replacements and repairs.
Q: What’s a good budget alternative to a smart drip irrigation system?
If you love the idea of automation but want to save money, pair a basic drip irrigation kit with a mechanical timer (often under $20). These timers attach directly to your hose and let you set daily watering schedules without Wi-Fi or app dependencies. For pressure-compensating flow, opt for a budget-friendly starter kit with 1.6 GPH emitters—these deliver even watering for small to medium flower beds. To add flexibility, use splitters to create multiple zones. This combo gives you automated, low-maintenance watering without the high-end price tag.
Q: Can I install a flower bed watering system myself, or should I hire a professional?
Most drip irrigation systems are designed for DIY installation, especially kits with push-fit connectors or pre-assembled tubing. If your garden is small or has simple terrain, you can complete setup in under an hour. For larger or complex layouts (e.g., multiple zones, steep slopes), consider hiring a pro to ensure even coverage and proper pressure balance. I recommend DIY for mid-range or budget-friendly systems—just follow the manufacturer’s guidelines, use color-coded tubing for organization, and test for leaks before planting. For premium smart systems, professional installation may be worth it to avoid voiding warranties or misconfiguring zones.
★★★★★4.8(10 reviews)